
There are probably lots of things that you don’t want your kids to access on your Mac. Your work documents. Questionable websites. Anything involving Justin Bieber. Your Mac has a host of features that can help keep your kids out of trouble; here’s how to use them.
Table of Contents
For Best Results, Make A New User Account
Before you start, you should create a new user account for you kids. This not only lets you apply different settings for your kids, it’s also an easy way to keep a snoopy 10-year-old from reading your email.
Open System Preferences, then select Users & Groups. Click the lock icon and enter your admin account name and password as requested. Next, press the “+” button at the bottom of the left-hand column: At this point, you’ll be presented with a dialog box asking for the pertinent information to create a new user account.

Give the new user account a Full Name and Account Name, and add a password if you like (it’s probably a good idea to do so, just in case someone gets ahold of your Mac without your permission). From the New Account drop-down menu, select Managed with Parental Controls. Press the Create User button to finish this step.
Getting Started With Parental Controls
Once you have an account set up for use with Parental Controls, it’s time to adjust that account’s settings. Go back to the main System Preferences screen, then select Parental Controls. Click the lock icon and enter your admin username and password as you did before, then select your kids’ user account from the list on the left. Once you do that, you should see something that looks like this:
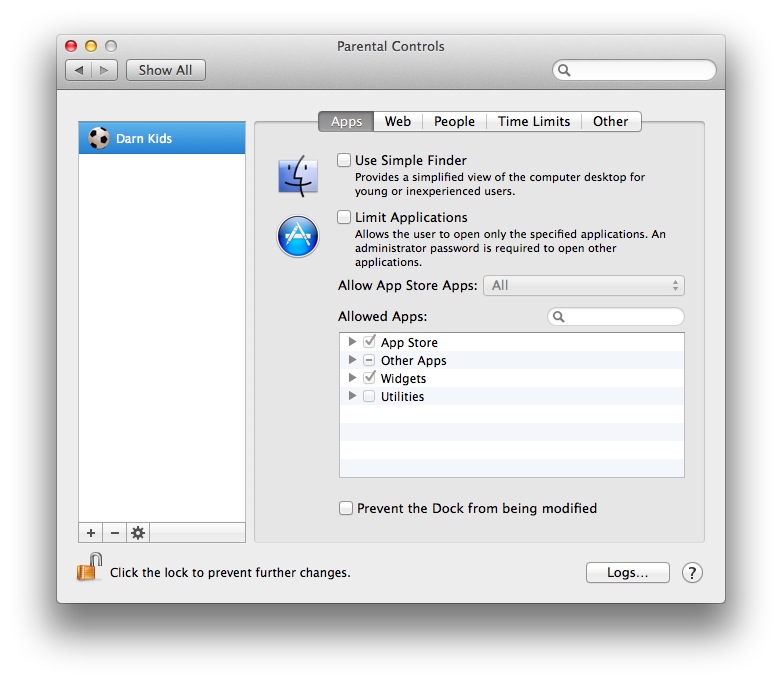
Although there are five tabs, the Parental Controls settings can be broken down into four basic categories:
Limit apps
If you have younger children, or just want to keep things as simple as possible for your kids, check the box labelled Use Simple Finder: This will strip away most of the Finder’s navigation (the sidebar and toolbar, for example), leaving a simplified view for accessing files and apps.
You can also pick and choose which apps you want your kids to be able to use by checking Limit Applications, then selecting apps from the Allowed Apps list. If you want to limit apps you’ve purchased from the App Store based on their age rating, you can do so through the Allow App Store Apps drop-down.
![[The Dock as it appears when you have Simple Finder turned on.]](http://www.macgasm.net/wp-content/uploads/2014/04/simple_finder_dock.jpg)
Don’t want the Dock to be messed with? select Prevent the Dock from being modified to lock it down.
Online safety
Apple’s online safety tools cover two areas: website restrictions and online interactions (who your kids can chat with, exchange email with, and so on).
The Web tab gives you several options for controlling which websites your kids can access: You can give them complete, unfettered Web access if you trust them enough, but you can also restrict them to only certain sites that you pick and choose.
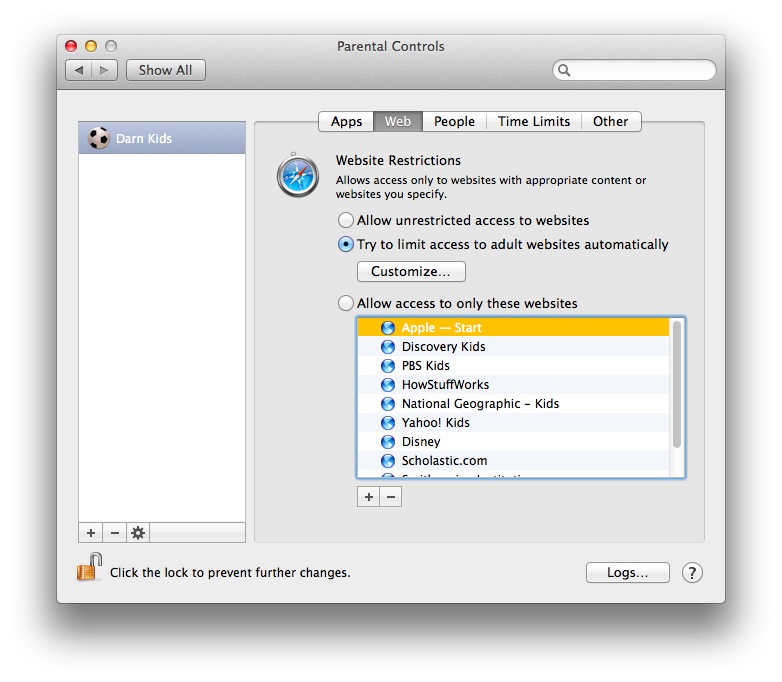
Or you can take a middle-ground approach and use the Try to limit adult websites automatically setting. With this option, Safari will try its darndest to block inappropriate websites, but if you want, you can click the Customize button and pick and choose which websites you always want to block or always want to allow. This can be useful if you trust your children enough to stay out of trouble but don’t want them spending all their time on YouTube, for example.
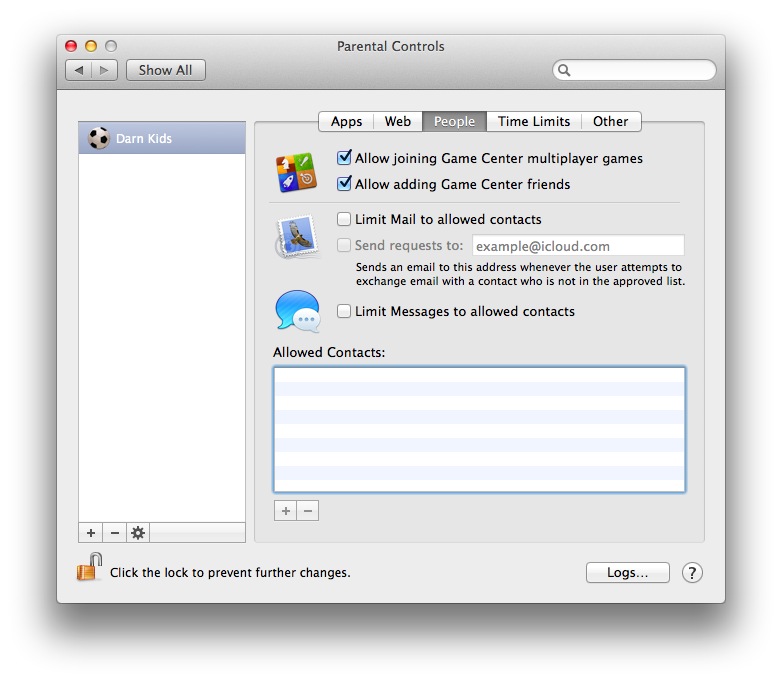
Hop on over to the People tab if you want to prevent your kids from talking to anyone and everyone on the Internet. You can keep you kids from joining multiplayer Game Center games or adding Game Center friends, and limit who your kids can exchanges messages with through Mail and Messages. This can be useful if you want to allow your kids to chat with their friends but don’t want them interacting with online strangers.
Time limits
Wanna keep your kids from playing Minecraft until midnight? Click the Time Limits tab and set some limits! Here you have a couple options: You can limit the amount of time your kids spend per day on the computer, or you can keep them off the computer during certain time periods (say, for bedtime or to keep them off the computer when they should be doing their homework). You can use these two features in conjunction with one another, of course.
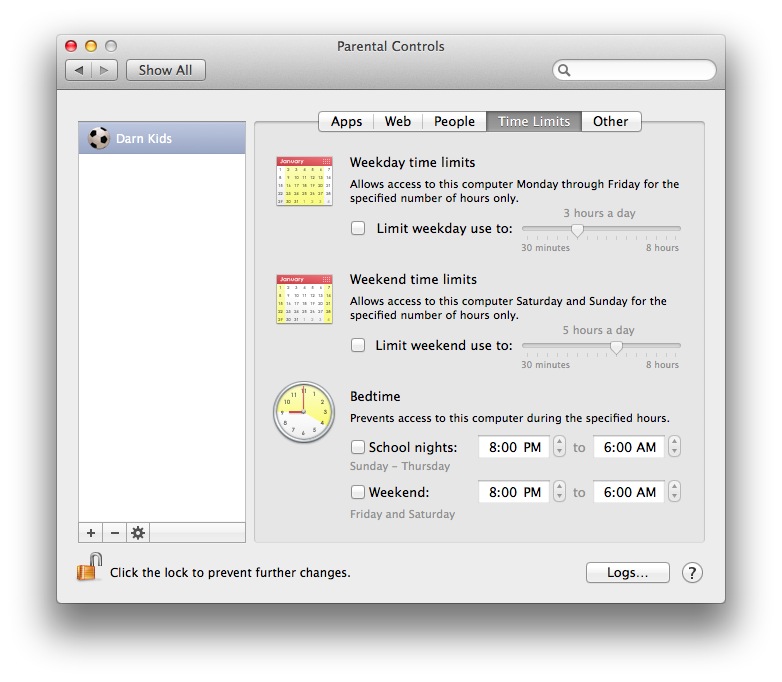
OS X lets you set different time limits and Bedtime settings for weekends and weekdays, just in case you’re OK with your kids spending all Saturday building in SimCity (the Bedtime feature considers Sunday-Thursday nights to be school nights, and Friday and Saturday nights to be weekend evenings).
Other restrictions
The Other tab is a catch-all of miscellaneous tools for disabling the webcam; preventing your kids from changing their login password; keeping works like “f***,” “c***,” and “d***” hidden in the Dictionary app, among other things. Give this panel a look and adjust it as you see fit.
Tips And Tricks
- OS X’s Parental Controls do have some limitations: Most notably, they’re designed for use with Apple’s own products, so while you can place limits on who your kids can send emails to using Mail.app, you can’t limit who they email if they use a different mail app. With that in mind, you’ll want to consider which apps you allow your kids to use if you employ Apple’s Parental Controls tools.
- If you want more detailed information on what your kids are doing on your Mac, click the Logs button: There you’ll be able to see which websites your kids have visited, which sites Safari blocked, which apps they used, and who they’ve been chatting with in Messages.
- If you have more than one child, you may want to give them their own user accounts but apply the same Parental Controls settings for each. You don’t need to go through and do this manually, though: Select the user account you’ve already set up, click the gear button at the bottom of the list on the left-hand side of the window, and select Copy Settings for “<Account Name>” from the drop-down menu. Next, select the other user account from the list, click the gear icon again, then select Paste Settings to “<Account Name>”.


