We here at Macgasm like to give our readers the best way to experience things on a Mac. So when a major shift in design comes from Apple, we like to be on top of that shift. The latest thing to get a redesign from Apple is Xcode.
Xcode, in case you’re not aware, is the software used to create any applications that are submitted to the iOS or Mac App Stores. In addition, Xcode is also used by many as a way to build their non-Mac App Store applications for distribution.
Xcode was introduced in 2003 with version 1.0. It’s been updated since then by introducing 2.0 with Mac OS X Tiger and Xcode 3.0 with Mac OS X Leopard. Finally, 4.0 was introduced today, between releases of Mac OS X 10.6 Snow Leopard and Mac OS X 10.7 Lion.
With version 3.x and previous versions, Xcode was comprised of a few different applications: Xcode itself, Interface Builder and Organizer. Xcode is used to do the actual coding, create classes and even debug. Interface Builder, as the name implies, is for building the interfaces for iOS and Mac OS applications. The organizer is where you provision devices (for iOS development), archive code, and conduct performance tests.
Xcode 4 has made a significant change. Instead of three different applications, there is now just one single interface for the entire application. Organizer is still a separate window with Xcode 4.
The initial opening window of Xcode has remained generally the same. You can still create a new Xcode project, get to the developer portal and get an introduction to Xcode 4.
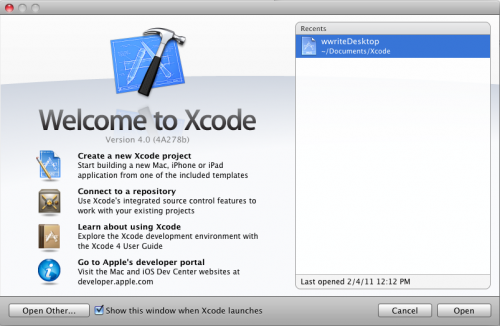
Within Xcode 4, you’ll notice that there’s a new option: “Connect to a repository.” This feature allows a user to connect to a GitHub or Subversion (SVN) repository and check-out or clone the project. With this being built in, it will make the process of code organization and collaboration significantly easier for teams of coders to work on the same project.
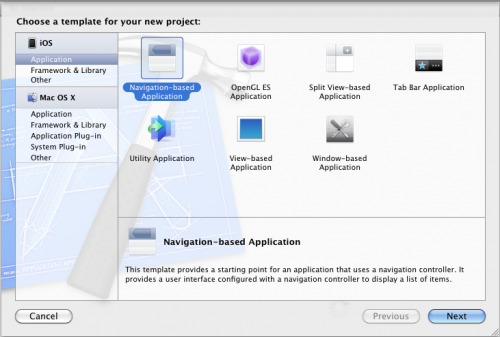
Once you do go and create a new application, you’ll be presented with the same options that you were before based upon which application type you’re creating.
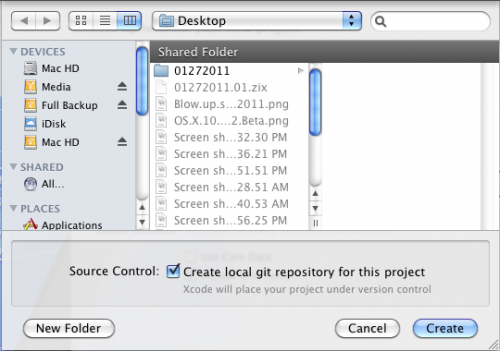
Once you get ready to create your program, you’ll see an option for “Save A local git repository.”This option, as far as I can tell, will make it easier to archive your projects to quickly revert should you need to bring up an older version.
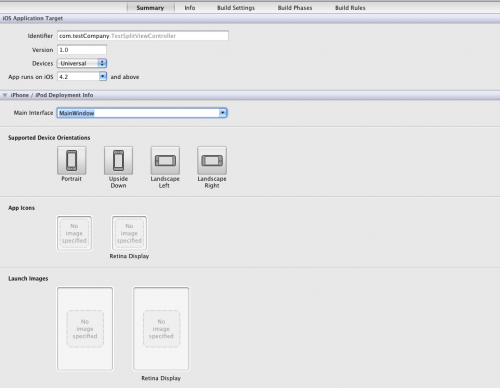
After creating your new application, Xcode 4 will present you with all of the options that you could need to set regarding your application. If you need to change the type of application from iPad to iPhone/iPod touch or universal, you can do so quickly by just changing the drop-down option. Once you do select the drop down, you’ll see new options pertaining to your change appear.
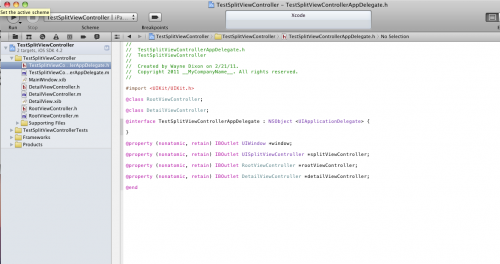
After you have set your options, you can choose any of the files from the left-side navigation tree. The code portion has not changed in any respect; it still looks the same.
There has been a minor change within the window. You’ll see a sub-navigation crumb-based menu. If you select some text, you’ll see that the crumb-navigation will show the type of text selected. In the screenshot below, you’ll see that the classname “TestSplitViewControllerAppDelegate” is chosen, and in the crumb-navigation, you’ll see the purple block that contains a “C,” meaning class. If you select a property, it’ll change to a slightly different shade of purple and show a ‘P’ in the little icon area.
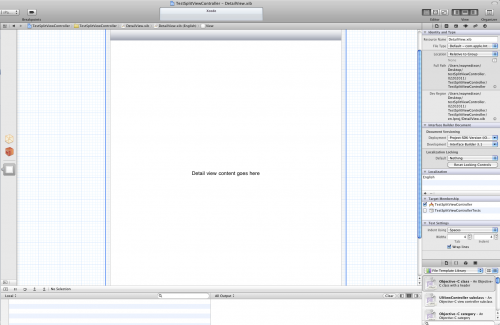
The biggest change, and the most difficult for me to get used to, is the inclusion of the Interface Builder within the main window. This is instead of Interface Builder being a completely separate application that launches when you attempt to edit an XIB file.
Upon first glance, you’ll see very simple setup with almost no indication of where to find any of your normal objects. It took me a few minutes to figure out what to do. The key is the upper-right corner.
The upper-right corner is the spot that controls everything you see within the screen. If you hit both the “Utilities Pane” and “Debug Pane,” the screen will be similar to the one below.
This view will get you closer to actually being able to do something; however, your objects are still not visible. In order to bring these up, you have two options. You can click the icons directly above the Library to change between Files, Code Snippets, Objects, and Media libraries. The second method to bring up these items is to go to View -> Utilities -> and bring them up that way.
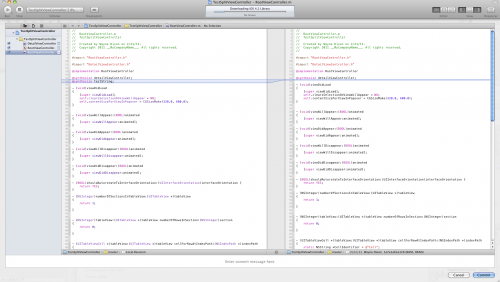
There was an allusion to a new feature: “Save” A local Git repository option. In order to use this option, you must go to File -> Source Control -> Commit. Once you do this, and if there are changes, you’ll be presented with a window that allows you to put in a “commit message.” This is the message used to indicate the changes for this commit. On the left side of this, you’ll see the files that have changed since the last revision. If you highlight one of these, you’ll see something similar to the image below.
On the left side, you’ll see your local revision of the file, and it will be compared to the one on the right, which is the git repository version. This view allows you to see what has changed and whether you truly want to commit the changes to the tree.
Once you’re ready to submit the changes, click on “Commit” and the changes will be saved. The Source control module allows you to either save locally, as mentioned earlier, or save to a remote repository should you have one setup somewhere.
Those are the highlights of XCode 4. It may take some time to fully get used to the new layout, if you’re used to Xcode 3. There are a significant number of changes, most notably the single window for editing and design and the repository option. The repository will definitely make it easier for developers to get a better handle on their code and archive versions for future reference.
If you’re a registered developer, go and grab it right now. If you’re not, you can get a free account which will give you access to Xcode 4. Take it for a spin and let us know what you think.

